Google
 

Saturday, June 30, 2007

Rosette and a visitor to the shop...

I have played the OOO a few times now (I use the term played very loosely!) and I just can't believe how much different it sounds from my Dread and OM. It is like the guitar is alive. I adjusted the nut, lowered the saddle, and compensated the saddle for intonation. This is the first time I have done this and it really wasn't that difficult. I used the 'move a piece of high E string back and forth under each string' method to locate the high points and just shaped the saddle to those points. It seemed to work pretty well. One thing I noticed though, I need a better tuner if I want to keep doing this. My tuner, although it is fairly good, has a digital needle that jumps around quite a bit and that makes fine tuning difficult. I don't know if it was my tuner, or my saddle but I was never able to get a couple of strings perfectly tuned both open and at the 12th fret. The 12th is just a hair sharp and no matter how far back on the saddle I set the string it still stayed sharp. I got it close, but not perfect. Oh well, maybe on the next one.

I spent some time working on the rosette of the SJ. I had three pieces of rosette blank wood that I purchased from Bob at RC Tonewoods to choose from. I had Red Myrtle, Olivewood, and Box Elder. After some thought, I decided to use the Box Elder. I like the lighter colored wood, but really like the pink splash on one side. With this being the first rosette I have cut myself, I had to figure out just exactly how to do this. After a bit of head scratching I worked it through in my mind and then went about cutting it out. The hardest part to figure out was first, the exact dimensions I wanted, but then how to hold the little piece of wood down and cut the circles without any of the parts moving. I settled on a very simple but effective method. (Isn't that the way it always works out, the simplest things usually are the most effective!) Anyways, I drilled and set the center post for my circle cutter, then I countersunk a screw next to the pivot point to hold the wood securely down . After thinking about how to go about cutting it, I realized that if I cut the inner circle first, there would be no way to hold the outer blank securely and more importantly dead center on the pivot because my point of attachment would now be free. So, I cut the outer ring first. This kept the circle still screwed to the table and the center point was still the reference point of the cut. I then cut the outer ring all the way to within a hair of all the way around. I was concerned that if I cut all the way around, the outer ring could move before I got the router out and then it would damage the edge of the rosette. It worked well. I had some sanding of the edges to do because it wasn't perfectly smooth, but it turned out very nicely.

I then routed the channel in the top. This was fairly simple. I started my cut within the body of the rosette and then moved slowly inwards and outwards until I had the channel exactly the size I needed. I then needed to decide on trim colors. I purchased several different pieces of colored trim strips - red, green, maple, black, and bloodwood. I decided against bloodwood and maple right off the bat because the bloodwood is so brittle and it is almost the same color as the red I had which is much more flexible, and the maple is so light that it would not show up. I set the rosette and red, then green, then black trim up as well as the abalone that will surround it to see what I liked. I settled on black. I liked the red, but since the headstock, fingerboard, and bridge are all ebony, I thought that the black tied it with that color scheme. I cut the pieces, and glued the rosette and trim to the top. Tomorrow I will try and get it sanded flat and then route out the next channel for the abalone and final trim piece. I think it will look really nice.

Finally, (sorry I know this has been long!) when I left the shop I had a little visitor in my front yard. A baby fox was in my yard looking for something to eat. We have two outdoor barn cats that are constantly catching mice but they rarely eat them. We are always finding little 'gifts' in the grass or on the sidewalk left by our cats. (YUCK!) Anyways this little fox was running around the yard sniffing for food and found one of the gifts for dinner. He hung around for about 5 minutes before a truck came up the road and scared it away. He wasn't afraid of me at all and he kept looking at me and then sniffing around. It was kind of fun. These guys are so cute that you want to play with them, but then I remember that they are wild and who knows what kind of diseases they carry. So, I keep my distance!


This was my shop visitor. Cute isn't he.


Here is the box elder blank. You will notice that I didn't center the pin on the wood. I wanted to get as much of the pink as I could in the rosette, but there is a knot in the top right corner, and there was a fairly big crack on the bottom right corner. I needed the outer cut to just skirt those flaws.


Here you can see I cut the outer ring first.


Then the inner cut. If you look at the top of the cut, you can see the tiny piece I left uncut to hold the ring from moving.


Here is the top with the center pin installed.


Sample number 1. Red trim. I really liked this but decided against it because of the black elsewhere on the guitar. I just didn't think it fit the theme I was going for.


Sample #2. Green. I didn't like this at all.


Sample #3. Black. I liked this and it ties in with everything else I am doing. This is what I settled on. I also like that it gives it a bit of a sophisticated look.


The rosette and two trims glued in place. Once it is dry I will sand it flat and then route out the outer ring for the abalone and black trim. It should look nice.

Wednesday, June 27, 2007

Strung it up.....

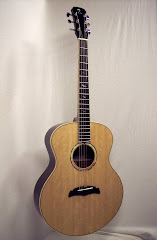
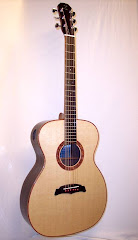
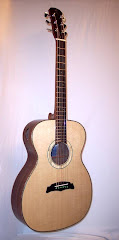
I finally got the OOO strung up tonight and all I can say is WOW! This guitar sounds amazing. It is very loud, a lot louder than my other two guitars and it has a very bright sound to it. Although it has a fairly small body, it has a nice deep bass to it too. I am really amazed at how good it sounds. I guess all the hype about Adirondack spruce is for good reason. Comparing it to my OM, the top is thinner, the bracing is lighter, and the overall guitar is lighter. It really makes quite a bit of difference in the feel of the guitar while strumming it. The guitar vibrates a lot more against my body than the other two do. I never expected to hear the sound I heard when I strummed a few chords for the first time. I am thrilled.

I still have some work to do on it though. The action at both the nut and saddle are very high and that causes almost every string to go sharp at about the 3rd fret on up. I will need to lower the nut somewhere around 2/32" and the saddle will probably need to be lowered somewhere around 3/32". Like I said, the action is really high! I would have taken the time to do it right then but I was too anxious to get it strung up so I could hear it. Heck, I was so much in a hurry, I strung it up completely before I realized that I had forgotten to take out the humidifier I had inside the body! It is rattling around in there still but I will take it out when I work the action.

So all that is left is to reset the action, compensate the saddle for intonation, and then polish it up for pictures.

Tuesday, June 26, 2007

Kerfing, bridges, necks, and a proud dad.....

First things first....... drum roll please...... I am now the proud parent of a high school graduate! My oldest daughter graduated high school on Saturday. We had a big party for her and both sets of grandparents traveled here from out of state to be part of the festivities. It was a great time and I am one proud papa!

Because of the big weekend, I didn't get to spend any time working on the guitars except for Sunday night and a little on Monday after work. I wanted to get the kerfing installed in the SJ so that was my first task. I cleaned the sides from the side brace installation and then took the kerfing out of the bender where it has been sitting for a week. I was really surprised that it held it's shape. My experience with kerfed linings is that they are very bendy and I never would have thought that they would hold the shape of the sides. I just thought that pre-bending would stretch and shape the fibers so they wouldn't break when bending around the waist. Anyways, I carefully cut the linings to length and glued them up and clamped them. I picked up some binder clips to do this one with because I wasn't happy with clothespins. They just don't have much strength and I figured binder clips would hold a lot better. The linings are now all installed and look great.

After that was done, I decided it was time to locate and glue up the bridge on the OOO. First though, I needed to make a nut for the neck. I made one earlier but it was a bit too short so I got a larger blank to make a new nut. Once it was cut and rough shaped I tacked it in place with some superglue. This was needed because the bridge location is based off of the nut edge. I spent quite a bit of time making sure that I had the bridge located and pinned in place. I then etched the lacquer with a razor blade so I could scrape the little bit of overlap. Once that was done, I glued it up and let it sit over night. On Monday I took the clamps off, cleaned the neck joint and glued it up. I am getting pretty excited to get this one strung up so I can see how it will sound. I have some fairly high expectations so I hope it lives up to them!


These are the bindings out of the bender. I was thinking that the paper was holding them in place but...


This is how they held their shape after I took the paper off. I was surprised.


One side glued and clamped in place. The other piece is holding purely by friction and pressure against the neck and tail blocks. It isn't glued up yet.


The top kerfing all glued and clamped. I did the back later in the day.


This is the little holder I made for sanding the neck break angle on the nut. These little things are hard to hold onto for shaping.


The angle sanded .


The nut set in the neck. I had to adjust the fingerboard just a touch to get the distance to the first fret perfect.


And here you can see it is perfect to the thousandth of an inch.


The bridge glued and clamped up.


The next day I glued the neck to the body. All that is left are the tuners, fret leveling and shaping, the saddle, and then string it up! I can hardly wait!

Tuesday, June 19, 2007

The OOO is alive again.......

Yesterday and today I spent quite a bit of time finish sanding and buffing the OOO. I have to say that I am pretty happy with the overall look. To he honest, I wasn't sure if I was going to like the look when it was still in the white, but now that it is shiny and the finish lets the grain pop, I like it. The finish is not perfect by any means but it is acceptable. I have a lot of pores that just didn't fill right so the finish is not mirror smooth like my Dread and OM. Unfortunately during the finishing I didn't get the sanding dust cleaned out well enough and I have several white spots in the back where the lacquer dust collected and I didn't get them out. I wiped it down between coats and sandings with naphtha but it must have just made the dust look clear when it was wet. It turned white after the naphtha evaporated but I didn't notice. Oh well, live and learn I guess. I am also very happy to say that I temporally set the neck and it fits almost perfectly. It is dead on from side to side, and the straight edge just touches the bridge about 1/32" below the top. I haven't cleaned the neck joint yet so I am guessing that when I do that it will raise to skim the top of the bridge.

I also made a change in my building technique for the SJ side braces. After reading a lot about the subject, I decided to try and use cloth reinforcements. It seems that a lot of high end builders are now going with cloth as all of the pre-war Martins were done this way. Several people have tested the strength of cloth braces and they tend to be stronger than wood at stopping cracks. It also makes it easier to tuck the braces under the kerfing, which is something I haven't done with my wooden braced builds. That is one of those things that the Stewmac instructions do a poor job of teaching. They have you cut the braces to but up against the bottom and top of the kerfing. Most all builders say that it is very important to tuck these braces under the kerfing from top to back. Again, live and learn. Anyways, I used fabric 'bias' for this job. First, it is all folded up so I unfolded it and ironed it flat. Then I mixed a 50-50 mixture of water and titebond. I masked the areas where I wanted the braced to be and glued the cloth on using the titebond mixture. It went very quickly and easily. I will coat the braces with a layer of shellac to protect them.


This is the SJ with pieces of the cloth bias ready to be glued to the sides.


The cloth strips glued to the sides. This is all I did on the SJ today.


Here is the OOO. The EIR turned out pretty nice and I really like how the bloodwood bindings turned a deep red color.


A side shot to show the bindings. Again I just love the red color. As you can see, there is some polishing to do yet.


The neck joint. It is darned near perfect. Those white spots on the neck are just dust on and in the pores. They are not under the finish, I just need to hit it with some compressed air to clean it out. It's amazing how dusty the guitar looks through the lense of the camera!


The other side of the neck.


The peg head. Those slots were pretty difficult to polish up!


This is the entire guitar with the bridge sitting on it. Overall, I am happy. The only thing I would change if I had it to do over again is that I would have used a different wood for the fingerboard. I would have liked it to be a little darker.


Sunday, June 17, 2007

Exploding dinosaurs and doing the twist......

So before I started my to-do list for today, I went up to the shop and got some work done on the SJ. First up was to cut the tenon on the neck. I used my tenoning jig to make most of the cuts on the table saw, and then I used the miter gauge to do the rest of the cuts. One thing I did was mis-measure the depth of the tenon versus the mortise I made. The tenon was about 1/8" too long and because the brass inserts were already installed, cutting the tenon wasn't an option. After a bit of head scratching, I finally figured out how to deepen the mortise without damaging the shape of it. I used a 1/2" mortising router bit that I slid a bearing and collet under the cutter. The bearing would ride inside the existing mortise and the bit would cut the bottom out. It worked fine. The only thing I wasn't thrilled with is that the shortest bit I had still made the slot a little deeper than I wanted. No big deal though, it just means there will be a 3/16" space between the back of the mortise and the end of the tenon. There should be a gap anyways, I just like to keep it a little smaller than that. After the tenon was finished, I took a couple of minutes and rough cut the radius of the heel with my band saw.

Once that was done, it was time to sand the top and back edges of the sides to the 15' and 30' radius' that I wanted. First I sanded the top edge to 30' using a radius dish. Once that was done I then could measure the depth of the sides, transfer a line around it and cut it to the correct size.

The method I use to do this is something I picked up from the kit guitar builders website. Essentially you make a cardboard grid with lines spaced 2" apart to set the sides on. Then you mark the plans in 2" increments, and then measure those locations for body depth. Those measurements are then transferred to the body using the cardboard grid, a square and a ruler. Tape is run around the perimeter of the body to 'connect the dots' so to speak. This gives you a line all around the body that matches the plans. This method works great but has one significant flaw if you are trying to build a radiused dome in the back and top. The side drawings of the guitar never actually represent the correct dimensions at the waist. This is because the waist, as it goes in towards the center of the body will need to be wider because the dome is deeper at that point. My first try at using this method is where I found this flaw. I rough cut the sides to the line but when I put it in the sanding dish, I realized that the waist was cut too deeply. I was able to compensate by sanding the neck and tail blocks down until the waist touched but this made the guitar a bit thinner than it should have been. When I built my OOO, I used the same method, however I left the waist a bit thicker to compensate for this. It worked great so I did the same thing here. This might not make sense to read, but I am posting pictures that should help you visualize what I am talking about.

Anyways, I taped the line around the body and rough cut it using my microplane and cordless drill. I then changed sanding dishes and then started dancing "The Twist" ! It must look funny watching me swivel the sides back and forth sanding them down. It's good exercise I must say!

So I now have a neck blank ready for carving, and sides ready for kerfing. Next up will be kerfing and then I will start working on the soundboard and rosette. The OOO is also ready for final sanding so I might get started on that this week if time permits.


This is the tenoning jig I use for this kind of cut. It holds the neck securely and square. It make it a very safe operation.


The mitre gauge helps with these side cuts.


The neck with the tenon cut out. Okay, you caught me. I have a bit of a sweet tooth!


I cut the rough heel arch with my band saw.


First I sanded the top radius to 30'.


Here is the radius dish after the top sanding. Here you can see just how purple the wood really is.


To transfer the body depth, I marked the dimensions in 2" intervals on the plan.


Then I used a grid board to transfer these measurements on the body. Then I wrapped tape around the body to connect the dots. The top edge of the tape is the cutting depth.


Here is the body after I rough cut close to the line using a microplane. You will notice I kept the cut quite high of the line at the waist going down into the lower bout. I told you the place was going to look like Barney exploded during this build!


This picture really shows what I was trying to explain above. This has been sanded to the 15' radius and you will notice that the sides don't even come close to the tape line. That is because the dome is deeper the closer to the center you get. If I had rough cut down to the tape line, I would have to remove a lot of material at the neck and tail to get the waist to the correct radius again.


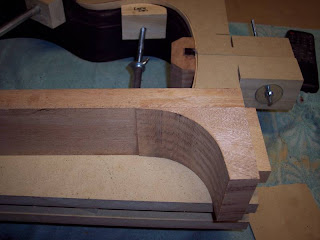
Here is the body with a radius board on it to show the waist dimension.

Saturday, June 16, 2007

Sometimes you just gotta sneak up to the shop.....

Well after spending most of the day doing a lot of yard work getting the place ready for next weekend's graduation party, I was able to sneak up to the shop for a few hours. The first thing I did was to get everything that I had clamped up out of the clamps and inspected the glue-ups. Everything looked very good. I decided to try a second shot at the neck block that I messed up yesterday. I trimmed it to size and then layed out the mortise. I set up the router station and routed the mortise out. I clipped the corners and sanded the mortise side to the shape of the guitar top arch. Once that was done, I glued it to the body and clamped it all up.

I then decided to work on the neck. Since the tail block is significantly larger than needed, I trimmed off some of the excess wood with my band saw. I then used something I don't usually touch, a hand plane. My abilities with a plane are poor at best, but there are some things that just require planing, or a ton of sanding. I planed the block flush to the neck blank and trimmed the end to length. I took some time doing a lot of measuring to lay out the neck arch, and the tenon. After I was convinced that I had it layed out correctly, I drilled the two bolt holes and installed the inserts. Last time I did this after I had cut the tenon, but I learned that wasn't the best way to do it because the sides of the tenon are fairly thin and want to bow out or crack while screwing in the inserts. I figured that it made sense to install the inserts while there was still a lot of wood around it. Because the epoxy needs to cure, there isn't much I can do on the neck now.

Before I left, I put my kerfing in the bender and bent it to shape. You might be scratching you head at this point asking yourself why on earth is David pre-bending the kerfing? Well, I am using reverse kerfing on this guitar and because of how it looks, I don't want to break the kerfing during installation. I started to try bending it around the body and right away I realized that it would break very easily around the waist. I got online and did some reading and found that it is common practice to pre-bend solid and reverse kerfing to minimize this problem. So I spritzed it with water, wrapped it in kraft paper, and then bent it. I will leave it in the bender until I am ready to use it.

I am still debating on what bindings I want to use. I bought a bunch of curly maple strips to bind it with, but I am kicking the idea around of going with ebony instead. I am using ebony on the head plate, on the bridge, and on the fingerboard. I am thinking that black ebony bindings would tie everything together. The only hiccup in the plan is that I want to bind the fingerboard and peg head. I can't bind it with ebony because everything else is ebony. So I am trying to decide if it would look good to have maple bindings on the neck and ebony on the body. I have to do some thinking on it.


Here is the second neck block blank. If you look closely you can see that I had to join two pieces together to make it tall enough.


The blank going through the router to make the mortise.


The mortise all cut in.


One little oops here. I originally was wanting to put the sapwood against the back, but I forgot to turn the sides over before gluing the tail block. Oh well, after reading some posts on the OLF, it seems that most guys like to put the sap wood lines against the top anyways. So I guess this oops worked out for the best.


Here is the neck block all sanded to shape and ready for glue up.


The neck block glued up and clamped.


Okay yeah, I really do own a plane, a bunch of them actually I just never use them. I am no good at tuning them as I don't have the patience for it. I have to admit though, there really is something cathartic about the feeling of the wood shavings coming up while planing. I guess I really should get more practice with them.


The neck tail block after planing. As promised, I am taking a lot of notes on this build as you can see by the yellow pad under the neck.


Here is the tenon layed out. The sections marked with an 'x' are the sections to be removed. This helps me keep it straight where the cuts need to be.


The brass inserts installed. I was much more careful this time to make sure I got them perfectly centered.


This is reversed kerfing. When it is installed it makes the kerfing look solid when looking through the sound hole. It also adds a lot of rigidity to the sides.


Orientation is important when bending. First the kerfs need to be facing up, and second two need to have the curved side point one way and the other two point the other way. This gives two mirror image pieces.