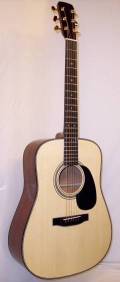
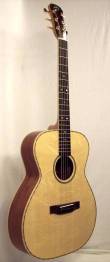
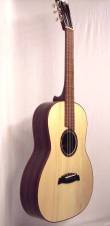
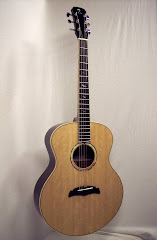
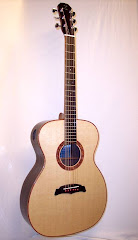
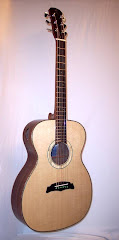
Not much for today. I didn't do any work in the shop, but I was fooling around with my other three guitars, playing all of them and I made some slight changes to the string spacing at the nut on the OM. I had the string spacing a little too close for my taste so I went ahead and re-cut the nut slots to get a spacing I liked. Now that I have the measurements, I will either fill all the slots and re-file them, or just make a new nut. I took a couple of pictures for the blog.
Sunday, October 28, 2007
Saturday, October 27, 2007
2 steps forward, 1 step back.....
Did you ever just have one of those days? Today I had one. I got up in the shop to work some more on the SJ and after inspecting the finish, I just wasn't happy. I had some pores that didn't fill right, and they collected the white sanding dust from leveling. I had gotten the back pretty good with the finish sanded down to the pores so it looked good. The sides however didn't. They had a lot more of those little divots with white spots in them. I decided to go ahead and try to re-level sand to try and remove them. I did this on the back and it worked pretty well and I didn't sand through so I figured I could do the same on the sides. I was wrong. I started to re-sand and just when I thought I had gotten them all leveled out, I saw that dreaded dull spot that is a telltale sign of a sandthrough spot. I had sanded through just above the waist on the upper bout a spot about the size of a quarter. So now I had a decision to make. I could just brush the sides with lacquer to fix it or I could rough sand the entire body and spray the entire thing again. Since I was already spraying the other two guitars today, I decided to just go ahead and re-spray it. I had a few small orange peal spots on the top that I didn't like, and I still had a few spots in the back center strip that the pores were showing anyways so I figured that I could most likely get them to fill now with new coats of lacquer. I sanded the entire body down to 400 grit (ouch that hurts after getting it shiny as a mirror!) and leveled out the top spots as well as the few grain spots in the back. I then shot 4 more coats over the body and it is now drying. It does seem to look pretty good. From what I can see, it looks like I got all the pores filled so it should polish up a lot easier now.
While I was in-between spray coats, I decided to try and level out the neck where some pores were also showing through. Yep, you guessed it, I sanded through into the stain! GRRRRR! So after a bunch of stain touchup to try and make it match the rest of the neck I re-shot the neck to fix that spot as well. So, the SJ is basically back to where it was 8 weeks ago. I did get the tuner holes expanded for the tuners, and the peghead is polished and looks great. I didn't re-spray that.
Yesterday I decided to try my hand at making a K-sled to make kerfed linings. I did a rough draft of the machine using stuff I had in my shop and gave it a try. It works pretty well. It holds the strip of wood perpendicular to my bandsaw, limits the depth of the cut, and automatically advances the strip a pre-determined distance for the next cut. All I have to do is put the wood in and slide it back and forth into the saw blade. Now that I know how it works and what kind of adjustments I need to make, I will most likely get some Lexan and make a more finished version of it.

This was the SJ body just before I decided to re-sand the sides. You can see the reflection in the back. It looked pretty good, not perfect but very nice. Hopefully it will look good again!

Here is the neck after sanding with micromesh. I decided to try and get rid of some of the pore spots and ended up sanding through the neck in one spot. This also has been re-sprayed.

This is the prototype of the Ksled I made. I got the plans off of the OLF and the original design was made by Frank Ford I believe.
While I was in-between spray coats, I decided to try and level out the neck where some pores were also showing through. Yep, you guessed it, I sanded through into the stain! GRRRRR! So after a bunch of stain touchup to try and make it match the rest of the neck I re-shot the neck to fix that spot as well. So, the SJ is basically back to where it was 8 weeks ago. I did get the tuner holes expanded for the tuners, and the peghead is polished and looks great. I didn't re-spray that.
Yesterday I decided to try my hand at making a K-sled to make kerfed linings. I did a rough draft of the machine using stuff I had in my shop and gave it a try. It works pretty well. It holds the strip of wood perpendicular to my bandsaw, limits the depth of the cut, and automatically advances the strip a pre-determined distance for the next cut. All I have to do is put the wood in and slide it back and forth into the saw blade. Now that I know how it works and what kind of adjustments I need to make, I will most likely get some Lexan and make a more finished version of it.

This was the SJ body just before I decided to re-sand the sides. You can see the reflection in the back. It looked pretty good, not perfect but very nice. Hopefully it will look good again!

Here is the neck after sanding with micromesh. I decided to try and get rid of some of the pore spots and ended up sanding through the neck in one spot. This also has been re-sprayed.

This is the prototype of the Ksled I made. I got the plans off of the OLF and the original design was made by Frank Ford I believe.
Tuesday, October 23, 2007
An old friend returns and more swap meet stuff....
Since the finishing of the twins is well underway and other than spraying lacquer and wiping on Tru-oil, there really isn't anything else to do with them. I suppose I can make the bridges but I really don't want to be kicking up all that dust while I am in the process of finishing the parts. So, I decided to dig out the SJ and start the task of level sanding and polishing it. The parts have had the lacquer curing for 2 months now so it is good and hard. I started by wet sanding with 400, 800, 1500, and 2400 grit paper. I then went with dry through all the micromesh grits. After that was done I wasn't happy at all with how it looked. It seems my pore filling wasn't quite as good as I thought it was and I had a lot of pores that telegraphed through the finish. Those little pores accumulated the white slurry from the wet sanding and the shiny finish was covered with white spots. I decided to start over and try and level sand it down to eliminate as many of these pores as possible. I have the back re-sanded through 800 grit and I almost have the pores gone. This is where it gets tricky. I want to sand enough to get rid of all the pores possible, but I don't want to sand through to the wood. So far I haven't sanded through but I still have a few pores that show. I got most of them with the re-sanding but there are still some that show. I now have the decision to make if I want to try and continue sanding down to eliminate more of them with the risk of sand-through, or stop now , polish, and then clean out the pores that have the white stuff in it. I will sleep on it and decide what to do tomorrow. Part of me says I don't want to ruin the finish by sanding through, but the other part wants it to be right and I am willing to risk it even if it means I have to re-finish the back. It wouldn't be the first time!
I received the Englemann top and 3 EIR fingerboards in the mail yesterday that I purchased in the swap meet. I have to say, the top has an incredible tap tone to it and it is very stiff. It has a deep resonance when tapped and it rings forever. Well, maybe not forever but a good 6-7 seconds that I can hear and probably longer. My ears ain't as good as they used to be! Too many years of hammer drills, chipping hammers, and other very loud construction equipment without proper hearing protection has taken it's toll. Of course when I was younger you couldn't convince me too use hearing protection because like all 20 year olds, I was invincible!
I scored a few more deals on the swap meet over the last few days. Below are pictures of what I got. I also ordered the Advanced Voicing DVD from John Mayes as he had a special price at the swap meet so I couldn't pass it up.

After a lot of sanding and polishing I got the body nice and shiny but I didn't like the pore divots that collected the white slurry from sanding. I decided to re-sand the back and try to level out the pores. If you look at the full sized image, you will see it is covered with white dots where the pores are. Not good!
I received the Englemann top and 3 EIR fingerboards in the mail yesterday that I purchased in the swap meet. I have to say, the top has an incredible tap tone to it and it is very stiff. It has a deep resonance when tapped and it rings forever. Well, maybe not forever but a good 6-7 seconds that I can hear and probably longer. My ears ain't as good as they used to be! Too many years of hammer drills, chipping hammers, and other very loud construction equipment without proper hearing protection has taken it's toll. Of course when I was younger you couldn't convince me too use hearing protection because like all 20 year olds, I was invincible!
I scored a few more deals on the swap meet over the last few days. Below are pictures of what I got. I also ordered the Advanced Voicing DVD from John Mayes as he had a special price at the swap meet so I couldn't pass it up.

After a lot of sanding and polishing I got the body nice and shiny but I didn't like the pore divots that collected the white slurry from sanding. I decided to re-sand the back and try to level out the pores. If you look at the full sized image, you will see it is covered with white dots where the pores are. Not good!
Saturday, October 20, 2007
And the finishing has begun.....
Today I had quite a bit of free time to work in the shop so I set my goal to get the first coats of lacquer on the twins bodies, and the first coat of Tru-oil on the necks. I had quite a bit of clean up sanding to do, I had to locate and mask off the bridge locations, mask off the parts that I didn't want finished and I had to make two sets of holders since the one holder set I have is still on the SJ. I got all that done and got the first 4 coats of lacquer on the two boxes. I did get the first coats of Tru-oil on the necks as well. I decided not to stain the necks as I really liked the way the wood had flaming and striping in it. The strips and flames really pop out when I wet them down with naphtha so I figured that Tru-oil would give them the same effect. I was afraid that stain would dull that look. With the first coat on, I think I made the right decision. The necks really look very interesting and I like it. I also didn't stain the dark body because I figured it was dark enough. I did stain the lighter colored body with a bit of brown and red mixed. I did quite a few different tests on scraps until I got the color I liked. My original plan was to try and get both bodies to look as close to the same color as possible, but I stumbled upon a color combination for the lighter colored one that just knocked me over and I stuck with it. The body has a platinum color to it now which blends in with the koa bindings. It really has a nice bit of sparkle to the color and I love the look.
 This is the lighter one that I stained. I used water based stain, was very careful about keeping the coat very light, and then once it was dry I wiped it down with denatured alcohol to pull some of the color back out. It gave this really cool gold/platinum color that actually shines. It is a lot nicer looking that I ever expected it to be.

This is the other body. I didn't stain it because it was dark enough. It also has a nice sparkle to it as you can see in the photo. I really like how the koa contrasts with it. This set has a bit of a purple shade to it. Both of these back and side sets were 'opportunity grade' sets which is another way of saying B grade. They don't have the nicest grain figuring (especially this darker one) but under finish the color really is very nice.
 This is the lighter one that I stained. I used water based stain, was very careful about keeping the coat very light, and then once it was dry I wiped it down with denatured alcohol to pull some of the color back out. It gave this really cool gold/platinum color that actually shines. It is a lot nicer looking that I ever expected it to be.
This is the other body. I didn't stain it because it was dark enough. It also has a nice sparkle to it as you can see in the photo. I really like how the koa contrasts with it. This set has a bit of a purple shade to it. Both of these back and side sets were 'opportunity grade' sets which is another way of saying B grade. They don't have the nicest grain figuring (especially this darker one) but under finish the color really is very nice.
Friday, October 19, 2007
New Zoot!!!
Other than a lot of sanding of pore filler, there isn't a whole lot of exciting things happening in the shop. I have one body pore filled and sanded to 320 grit, and the other one is pore filled and still in need of sanding. The peg heads have also been pore filled but they also need sanded. I should have them done by the end of the week.
I mentioned that I have been spending a lot of time on the OLF swap meet. I thought I would post some pictures of the zoot I have purchased so far.....

 I also got 2 Mahogany neck blanks but I don't have a picture of them. For reference, I was able to get all of this wood for less than the cost of a kit from LMI, Stewmac, or Martin. The swap meet is a fantastic place to get beautiful wood for a great price.
I mentioned that I have been spending a lot of time on the OLF swap meet. I thought I would post some pictures of the zoot I have purchased so far.....

First up the eye candy. I got this set of Black Limba.
 I also got 2 Mahogany neck blanks but I don't have a picture of them. For reference, I was able to get all of this wood for less than the cost of a kit from LMI, Stewmac, or Martin. The swap meet is a fantastic place to get beautiful wood for a great price.
Wednesday, October 17, 2007
Update....
Well, there is a lot of sanding dust in the shop. I spent the last couple of sessions in the shop doing all of the final sanding on the 'twins'. I also got the second neck joint finished and looking good. Tonight I took both guitars out in the sunlight to look for any sanding defects then spent a little more time sanding out the blemishes I found. Tonight I got the first coats of pore filler on, and sanded down. Tomorrow I will get the next coats on and sanded, which hopefully will be the last of the pore filling. I picked up a different filler at Woodcraft today to try out but unfortunately it is a white colored paste. I tested it on some scrap, but it looked terrible so I guess that was $18 wasted. Oh well, live and learn I guess. Fortunately I have some left over from the other guitars so I had enough to do these two. I picked up some Tru-oil to use on the necks of these two guitars. The nice thing about it is that I don't need to pore fill before as it will fill the pores. It is supposed to make for a very fast neck and the scrap Sapele I tested it on looks really nice. I think it will make a great looking neck.
I have been hanging out at the OLF a lot the last few days spending money at the fall swap meet. I have gotten a beautiful Cherry back and side set, a stunning Ambrosia Maple set, some Lutz tops, some fingerboard blanks, neck blanks, and bridge blanks. The swap meet goes through next Wed. so there should still be some great deals to be had. I hope my wallet can hold out!
Sorry, no pictures tonight. Sawdust just doesn't photograph well! lol
Monday, October 15, 2007
Neck sets and edge markers....
I spent a few hours doing some fine tuning of the two neck joints. I have one done and the other is almost done. It takes a lot of sanding to get the joints tight because of the hardness of the neck wood. I was getting tired of neck joint flossing so I decided to install the fingerboard edge markers. I usually do this when the fingerboards are still off the necks, but I actually forgot to do them. I am glad I remembered before finish went on! Here are pictures of the neck joints. Sorry but no pictures of the heel caps on these ones. Since I have the recipients initials inlayed in them, I don't want to accidentally blow the surprise if they accidentally look at this site! I will show pictures of them when I post the finished guitar pictures after Christmas.

The other side of the same neck. There is a tiny gap just before the heel cap caused by a slight dip in the sides. I don't want to sand anymore off of the neck so I will fill the gap at the finish. It is a very tiny gap that really isn't visible unless you look for it so it should fill fine.

The other side of the same neck. There is a tiny gap just before the heel cap caused by a slight dip in the sides. I don't want to sand anymore off of the neck so I will fill the gap at the finish. It is a very tiny gap that really isn't visible unless you look for it so it should fill fine.
Saturday, October 13, 2007
Heel caps and soundports....
Today I spent quite a bit of time getting the neck sets fine tuned so they are about as good as they will get. Both necks joints turned out very nice with virtually no gaps at all. After that I went ahead and cut the heel caps out and glued them on. I decided that I wanted to put sound ports in these two guitars as I have never done them before, and I read that they add a lot to the sound and volume of a guitar. Instead of doing a fancy design, I decided to go with the basic oval shape. I cut out a template to use for a tracing pattern, marked the upper bouts where the side braces were so I didn't cut into them, and marked the ovals. I used my dremel with a down cut spiral bit and router base to cut them out 'freehand'. I was a little nervous about doing them, but really they were pretty easy to do. I sanded the edges to clean them up and they look pretty good. It was interesting to hear the difference in the tap tones of the boxes before and after the ports. It added a bit more sustain, and a lot more volume of the tap. I can't wait to hear what the actual guitars sound like!
Thursday, October 11, 2007
Two necks set, fingerboards glued.....
Today I got the second guitar neck set to the correct angle and straight. I still have some fine tuning to get all the gaps out, but at this point I was just wanting to get the angles right, and the joints close. This guitar went much quicker than the other because the neck block was dead on. Note to self, from now on make sure the neck blocks are straight!
Once that was done I went ahead and glued the fingerboards down to the necks. It went pretty easily and since Stewmac sent two big rubber bands in my first kit, I had enough to do both in one session.

One side of the neck joint. You can still see some small gaps but nothing that can't be corrected after the fingerboard is attached.

Both necks with the fingerboards attached. Yeah, I know only one is taped. I forgot to tape the second one and realized it only after I had spread the glue on the neck. Oh well.
Once that was done I went ahead and glued the fingerboards down to the necks. It went pretty easily and since Stewmac sent two big rubber bands in my first kit, I had enough to do both in one session.

One side of the neck joint. You can still see some small gaps but nothing that can't be corrected after the fingerboard is attached.

Both necks with the fingerboards attached. Yeah, I know only one is taped. I forgot to tape the second one and realized it only after I had spread the glue on the neck. Oh well.
Tuesday, October 9, 2007
Frets and first neck set....
Today I spent time with the fingerboards getting them ready for gluing to the necks. First I sanded them down and polished them with micromesh. It is a lot easier doing this without the frets installed so I did it first. Once that was done, I cut the frets and installed them. Nothing exciting, just a bunch of hammering! I was going to glue the fingerboards to the necks, but before I did I decided to work on the neck sets. I am glad I waited. I noticed that both bodies have a slight bulge directly under the fingerboard extension locations. My guess is that the A frame bracing is causing the slight bulges. So instead of gluing the fingerboards down, I decided to get the neck sets close to finished so I can use the flat tops of the necks as a guide to sand down the top so the fingerboards can sit flat on the top. If I had glued the fingerboards on, it would be a lot harder to do this.
I decided to start with the most difficult neck first so I could get it over with. This is the one I mentioned last time where the neck block ended up slightly tilted. It took a lot of time but I finally got the neck straight, with a good back angle and a fairly nice joint. The joint will need to be cleaned up as I have a few small gaps in it, but it is good enough for now so I can get top sanded. One thing I have learned about these Sapele necks, the wood is hard, splintery, and the neck joint is very hard to sand. The typical 'flossing' method takes a very long time to remove the smallest amount of wood. I guess this is a good thing, but it took a long time for me to get this neck set. Hopefully the next one will go easier. I have two more Sapele neck blanks on my shelf that I will probably use, but they will probably be the last ones I get for a while.

This is the first guitar with the neck temporarily set. It took a lot of work to get this one lined up and at the correct angle because of the neck block error, and the difficulty of this wood to work with.

The right side of the neck joint. You can see a small gap right at the top. there is also a gap at the tail, but that is getting cut off for the heel cap so I am not worried about it.

Here is a closeup of the fingerboard end at the sound hole. I know, a lot of guys like to build the fingerboard so it lines up right along the edge of the sound hole. I personally don't care for that look. I decided to line it up just under the bottom perfling strip so there is still a line of spruce between the dark fingerboard, and the darkness of the sound hole. I did both of the guitars this way.
I decided to start with the most difficult neck first so I could get it over with. This is the one I mentioned last time where the neck block ended up slightly tilted. It took a lot of time but I finally got the neck straight, with a good back angle and a fairly nice joint. The joint will need to be cleaned up as I have a few small gaps in it, but it is good enough for now so I can get top sanded. One thing I have learned about these Sapele necks, the wood is hard, splintery, and the neck joint is very hard to sand. The typical 'flossing' method takes a very long time to remove the smallest amount of wood. I guess this is a good thing, but it took a long time for me to get this neck set. Hopefully the next one will go easier. I have two more Sapele neck blanks on my shelf that I will probably use, but they will probably be the last ones I get for a while.

This is the first guitar with the neck temporarily set. It took a lot of work to get this one lined up and at the correct angle because of the neck block error, and the difficulty of this wood to work with.

The right side of the neck joint. You can see a small gap right at the top. there is also a gap at the tail, but that is getting cut off for the heel cap so I am not worried about it.

Here is a closeup of the fingerboard end at the sound hole. I know, a lot of guys like to build the fingerboard so it lines up right along the edge of the sound hole. I personally don't care for that look. I decided to line it up just under the bottom perfling strip so there is still a line of spruce between the dark fingerboard, and the darkness of the sound hole. I did both of the guitars this way.
Subscribe to:
Posts (Atom)


