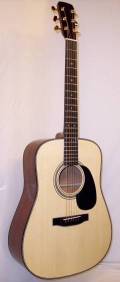
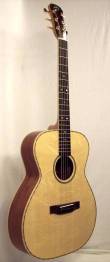
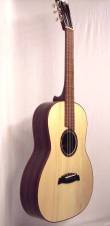
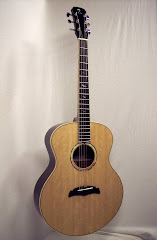
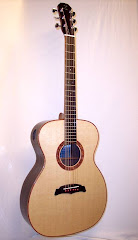
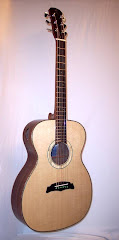
I got a chance to get the bridges glued on yesterday using the two new bridge clamps I made. They worked really well and they work quick. That is important when hot hide glue is involved. I got the bridges cleaned up today and did some small touch up's on the top lacquer where there were some small gaps around the sound hole and perflings that didn't get filled correctly. The gaps aren't noticeable until the polishing gets done because the white compound gets in and then they gaps look white. I picked the compound out with an x-acto blade and them drop filled the spots with thin CA glue. I re-sanded the tops to level the drop fills out. After that was done, I did some touch ups where I sanded through the finish at a couple of spots on the binding edge when I did the original level sanding and polishing. I am still waiting on the saddles and nut files I ordered so I don't have much left to do on them until those items arrive.
Wednesday, November 28, 2007
Sunday, November 25, 2007
Necks attached.....
I have to apologize for the lack of updates lately. Things have been crazy busy with the Thanksgiving holiday and hunting season being in full swing. I have been spending as much free time as possible in the woods so I haven't had much time in the shop. Today after work and in-between some other neglected chores around the house, I spent a couple of hours in the shop getting both necks glued to the bodies. I used hot hide glue on these necks as I did on the SJ. Other than having to work fast getting the bolts in and clamps on, the glue-ups went well. According to the weatherman, tomorrow is supposed to be a lousy rainy day so that will keep me out of the woods and in the shop after work so I can get the bridges glued on. Of course the weatherman has been known to be wrong before so I may just end up in the woods after all! I live for hunting season so pretty much everything comes to a grinding halt during the season. I spend as much time as I possibly can in the woods which usually is most nights after work, and all day Saturdays. I am really glad that I have the twins to this point in the building process so I don't have to rush the final setup and I also don't have to choose between hunting and building. As much as I love building guitars, it would have to take a second seat to hunting.
Unfortunately, winter has arrived in it's full glory so my shop is very cold. I had to drag the propane tank up there today so I can fire up the propane heater shortly. So far my electric heater has done a fairly good job of warming things up but I think we are at the limits of what that heater can do.
I did join up the back for the parlor guitar that I am going to build next. I have a small set of striped Honduran mahogany that was just barely enough for an 00 sized guitar. After joining and gluing, the top right now is EXACTLY the same width as the 00 size lower bout width. I do mean exactly too. The body is supposed to be 14 1/8" wide and the wood is 14 1/8" wide. So, I have made the decision to change to an 0 sized guitar. That gives me a little bit of extra wood around the lower bout, roughly 1/4" on each side which I am a lot more comfortable with. I really didn't have my heart set on the 00, I was just wanting to get the most out of the back set. I am just not comfortable using a back that has zero room for error. The back is a beautiful piece of wood and I am very excited to see how it will look when finished. I am still deciding what neck wood to use. Part of me wants to use spanish cedar again, but I really hate the resin that gets on my hands when working with it. I like how light weight it is however and it does work very nicely with tools. I am leaning towards using mahogany so it matches the back and sides. I still have some time to think about it.
I picked up a couple of "Kermodie" tops this last week. It is a trademarked name for Lutz spruce. I have to say, I am impressed with the stiffness of this wood. It is incredibly stiff and the ring count is too tight to actually count. I have a few more of these tops coming as well as a billet of it for re-sawing. My next build after the parlor will probably be using one of these tops.

Tuesday, November 20, 2007
Two shiny guitars....
I was able to get the twins all polished up this weekend and tonight I got started with the final neck sets. I realized that when I bolted the necks in and sighted down them, I had a pretty major hump at the 14th fret where the fingerboard extension bowed upwards. This is because I radiused the top braces and with the A frame bracing I used, it puts a pretty big hump above the sound hole. So, I had to do some sanding on both the top of the guitar and the underside of the fingerboard extension to bring it down so the fret line is straight. Both guitars had this problem and I am not sure why I didn't notice it when I was doing the initial neck sets. The lesson I learned on this is that I am going to stop radiusing the braces above the upper bout. Every guitar I have built I have had to deal with the radius under the FB extension but nowhere near this extent. Anyways, I finally got them leveled out and ready for gluing. I also finished the bridges and sanded the undersides to the radius of the top. I am going to make a bridge clamping jig for these two guitars to clamp the bridges down during the glue up. I am going to make them based on the Fox style clamp with a couple of small modifications. This should make my bridge gluing a quicker and more accurate procedure. If all goes well, I might just have these two strung up in the next week. There is a lot happening with Thanksgiving and hunting season so I am not sure how much time I will actually get to work on them, but it would be nice if I got them done before December.

Here are the backs. The picture does a lousy job of showing the finish. It is a mirror finish like the others I have built.

Here are the backs. The picture does a lousy job of showing the finish. It is a mirror finish like the others I have built.
Thursday, November 15, 2007
Building bridges......
Today I decided it was time to make the bridges for the twins. I used the same design I put on the SJ as I like the look. I won't get into great detail of how I do it, but I do have quite a few pictures of the process. Basically I cut the shape using a template on my router, I cut the wings using a chisel, saw, and file, I radius the top, round the edges and then cut the slot. I should get to polishing the twins sometime next week as time permits. Things have been (and will be) busy around here so I haven't spent much time working on them. I need to get moving if I want them done by Christmas.

First I cut the blank to shape using this template. One side is one half of the shape and the other side is the other half. It makes very quick work out of shaping the blank.

and I end up with two slotted bridges. I still need to drill the pin holes and sand/polish them but I can do that later. The observant reader might notice that these two bridges have a slightly shallower compensation angle than my others. That is because this is a short scale instrument. I have been using just under a 5 degree angle for the long scale but after some research I learned that a 3.5 degree angle works well with a short scale guitar. It is still a little more of an angle than the standard off the shelf Martin style bridge. The entire job getting these to this point took about 2 hours.

First I cut the blank to shape using this template. One side is one half of the shape and the other side is the other half. It makes very quick work out of shaping the blank.

and I end up with two slotted bridges. I still need to drill the pin holes and sand/polish them but I can do that later. The observant reader might notice that these two bridges have a slightly shallower compensation angle than my others. That is because this is a short scale instrument. I have been using just under a 5 degree angle for the long scale but after some research I learned that a 3.5 degree angle works well with a short scale guitar. It is still a little more of an angle than the standard off the shelf Martin style bridge. The entire job getting these to this point took about 2 hours.
Sunday, November 11, 2007
All strung up......
Well I got busy this weekend and got the SJ all strung up. It sounds really good! I glued the bridge on Thursday night using hot hide glue, and let it sit until Saturday before putting string tension on it. Really all that was left was to install the tuners, make the nut and saddle, and string it up. I still need to do a setup as the action is miles high but all in all I am very pleased. One thing I was extremely happy about was the intonation at the 12th fret was dead on without any saddle compensation. I still need to do the harmonics for intonation but it looks like there won't be much saddle work needed.
Today I started my next project, a Mahogany and redwood 00-12 fret parlor sized guitar. I have been wanting to build one of these and I figure this is the time to do it. I joined the top (after snapping the first top in 4 pieces! Grrrrr!) and will probably join the back this week. I am going to get back on the twin guitars here shortly so I probably won't get into the 00 until late this year or January. Hunting season starts this weekend so with that, the holidays, and other things I am going to have to work hard to get some shop time. Oh well, it's that time of the year!
Here are a few pictures. When I get a minute I will polish it all up and take some proper pictures. These will do for now though.
Wednesday, November 7, 2007
SJ neck set....
Tonight I spent my time getting the neck ready for final gluing and glued it up using hot hide glue. This was the first time I used HHG for a neck set and it really went pretty well. I pre-heated the neck and the neck block with a heat gun, had everything set up and ready to go, and then went to work with the glue. For those who don't know what hot hide glue is, it is a glue made from animal hides which is dissolved in water and then heated. It is applied hot, between 140 and 145 degrees Fahrenheit, and it has a fast set time. Typically I get around 45 seconds to have the glue applied, the piece set, and all clamps on. The glue will gel over after that time and once that happens, it is too late to clamp. Pre-heating the gluing surfaces will give a bit more working time but not a lot. I had about a minute for this neck. It seems like a lot of hassle, but there are some very good reasons to use HHG. First, it is reversible. If a glue-up goes wrong, it can be un-done using heat and steam. That is the main reason furniture restorers like to use it. Of course, they also use it to be historically correct in their repairs. When it comes to guitars, any future repairs or the inevitable neck-reset will be significantly easier because of the use of HHG. Repair people love the stuff. Next it is incredibly strong, stronger than alphaic resin type glues and just a touch less strong than epoxy. Third, it dries rock hard which is a great thing for tone transfer in a musical instrument. Forth, clean up is a breeze. A little bit of warm water completely removes and squeeze out. The final reason I like it is that it makes a very quick 'tack' which holds the glued pieces together while clamping. Regular white glue or Titebond type glues do not do this and trying to clamp some things together can be very frustrating as the pieces want to slip and slide out of position. I just started using HHG on this SJ and so far I have only used it on braces and this neck joint. I am going to also glue the bridge with it. Once I get more comfortable using it, I will try and use it for most of the building process.
Anyways, that is probably a lot more about glue than you ever wanted to know. Here is a picture of the neck clamped up. Not very exciting but it shows that the end is very near for this guitar.
Anyways, that is probably a lot more about glue than you ever wanted to know. Here is a picture of the neck clamped up. Not very exciting but it shows that the end is very near for this guitar.
Tuesday, November 6, 2007
Ready for neck and bridge glue up.....
I spent some time getting the bridge location exact with locating pins set and re-setting the neck. After all the lacquer work, the neck had shifted a little so I needed to get it reset. It was off to one side, and it had also tilted back a touch. Nothing major, but enough that it needed addressed. I also repaired the small sand through spot on the side and got that sanded down and polished.
I learned a little trick on the OLF site about getting a good looking finish line around the bridge. One of they guys showed one of his bridges that he had routed a very fine rebate around the very edge of the gluing surface of the bridge. What this does is allows the luthier to glue the bridge to the body without having to scribe the finish perfectly around the bridge. When I mask the bridge off, I keep the tape inside the bridge line by about 1/16". I have been scribing around the bride and scraping that last little bit of finish off before gluing. This is a very hard thing to do and make it look good. With this system, the finish now can remain that 1/16" under the bridge without putting stress on the glue joint. It is a very simple solution to the problem that makes me wonder why I never thought of it! I made a little jig to attach to my dremel which turns it into a tiny router station. I used a 1/8" downcut spiral bit poking through less than 1/64" with a dowel that covers about 1/3 of the bit. That gives me a channel a touch wider than 1/16" and as deep as the finish is thick. I ran my bridge through it and tested it on my guitar. It worked great! I am attaching a few pictures so you can understand what I am talking about. If time permits, tomorrow I will set the neck, and possibly will glue the bridge down.

Here you can see the bit just poling above the base. It is just a hair above the base because I only want the rebate to be the depth of the finish thickness.

This is the under side of the bridge showing the rebate. The picture makes it look a lot deeper than it is. It is less than the thickness of a piece of paper deep. I took the picture with a shadow so you could see the rebate. I also sanded the bridge to the radius of the top.

Here you can see how the finish slides neatly under the bridge. This doesn't weaken the glue joint at all. If you click the picture, right under my fingers you can see the finish to bare wood line. That is what I typically end up seeing and what I am attempting to avoid.

Here is a picture of my ever growing wood stash. I have 7 back and side sets, 7 tops (2 more on the way), 5 fingerboards, 6 bridge blanks, 2 neck blanks (3 more on the way), 8 rosette blanks, and about 30-35 headstock veneers. I also have a bunch of brace wood not shown, and some heel and neck blocks. The side wood you see on top is the black limba. It is incredible looking wood as is the curly cherry I got at the swap meet. It is beautiful wood.
I learned a little trick on the OLF site about getting a good looking finish line around the bridge. One of they guys showed one of his bridges that he had routed a very fine rebate around the very edge of the gluing surface of the bridge. What this does is allows the luthier to glue the bridge to the body without having to scribe the finish perfectly around the bridge. When I mask the bridge off, I keep the tape inside the bridge line by about 1/16". I have been scribing around the bride and scraping that last little bit of finish off before gluing. This is a very hard thing to do and make it look good. With this system, the finish now can remain that 1/16" under the bridge without putting stress on the glue joint. It is a very simple solution to the problem that makes me wonder why I never thought of it! I made a little jig to attach to my dremel which turns it into a tiny router station. I used a 1/8" downcut spiral bit poking through less than 1/64" with a dowel that covers about 1/3 of the bit. That gives me a channel a touch wider than 1/16" and as deep as the finish is thick. I ran my bridge through it and tested it on my guitar. It worked great! I am attaching a few pictures so you can understand what I am talking about. If time permits, tomorrow I will set the neck, and possibly will glue the bridge down.

Here you can see the bit just poling above the base. It is just a hair above the base because I only want the rebate to be the depth of the finish thickness.

This is the under side of the bridge showing the rebate. The picture makes it look a lot deeper than it is. It is less than the thickness of a piece of paper deep. I took the picture with a shadow so you could see the rebate. I also sanded the bridge to the radius of the top.

Here you can see how the finish slides neatly under the bridge. This doesn't weaken the glue joint at all. If you click the picture, right under my fingers you can see the finish to bare wood line. That is what I typically end up seeing and what I am attempting to avoid.

Here is a picture of my ever growing wood stash. I have 7 back and side sets, 7 tops (2 more on the way), 5 fingerboards, 6 bridge blanks, 2 neck blanks (3 more on the way), 8 rosette blanks, and about 30-35 headstock veneers. I also have a bunch of brace wood not shown, and some heel and neck blocks. The side wood you see on top is the black limba. It is incredible looking wood as is the curly cherry I got at the swap meet. It is beautiful wood.
Saturday, November 3, 2007
Back where I started.....
Well after a lot of sanding and touchup work, I now have the SJ back to the point it was a week ago. I was able to get the neck sand-through repaired to an acceptable level, and the body is now re-sanded through the micromesh levels. I still need to do the swirl remover and polishing but the guitar looks pretty good. I spent a lot of time working very carefully on it so I could get it looking good without sanding through again, and other than one really tiny spot where the first sand-through happened on the body I succeeded. Like I said, I had one very small spot, about the size of a pencil eraser that I barely sanded through. I have hit that spot with my little air-brush so I can touch up that area without bothering the rest of the guitar. I think a buffing machine is in my future. I am convinced that if I hadn't sanded so much with micromesh, I wouldn't have gone through the finish in the first place. It is very disheartening to have a beautiful looking guitar neck get damaged by sand through. No matter how hard I try, once the stain has been sanded through it is nearly impossible to repair the damage invisibly. It really is a bummer to put all that work into something only to have something as stupid as a sandthrough blemish what could have been a beautiful neck. Oh well, such is life. Lots of pictures tonight so hold on, here we go!

First things first. After I made my prototype K-sled, I went ahead and made a real version with a couple of upgrades. The moving and sliding parts are all made of Lexan.

Here is a sample of a strip I ran through it. After some fine tuning, I have it working well. Now I need to make some linings for real!

And the side. Again, you can see the reflection on the front of the rags and stuff. The bridge tape was sprayed and sanded over making it as polished as the top finish. lol

I had someone ask about the 'brass' plate I had on the back of the peghead. Here is a better picture showing that it is ebony. I still need to hit this with swirl remover as you can see some fine scratches in it. It is natural ebony wood that I didn't dye. I kind of like the natural look of ebony with some light grain marks in it. It is a personal preference thing.

First things first. After I made my prototype K-sled, I went ahead and made a real version with a couple of upgrades. The moving and sliding parts are all made of Lexan.

Here is a sample of a strip I ran through it. After some fine tuning, I have it working well. Now I need to make some linings for real!

And the side. Again, you can see the reflection on the front of the rags and stuff. The bridge tape was sprayed and sanded over making it as polished as the top finish. lol

I had someone ask about the 'brass' plate I had on the back of the peghead. Here is a better picture showing that it is ebony. I still need to hit this with swirl remover as you can see some fine scratches in it. It is natural ebony wood that I didn't dye. I kind of like the natural look of ebony with some light grain marks in it. It is a personal preference thing.
Subscribe to:
Posts (Atom)


