I have ordered all of the parts and pieces for the next two builds. I have given a lot of thought about whether I want to build two 'identical' guitars, or two different ones. I think that I will go ahead and make twin guitars if you will. My thinking is that I would like to make two of the same guitar using the same woods but..... and this is a big but.... I want to do two different bracing systems and work with different top thicknesses. I figure this is a fantastic opportunity for me to learn how different bracings (parabolic VS scalloped) and top thicknesses affect the final sound of the instrument. I don't think I will be getting this kind of an opportunity very often so I might as well take advantage of it while I have the chance. Since these two guitars are going to be gifts, I am not under any pressure to make a certain type of guitar so I have a ton of freedom to make changes between the two. Now I need to decide what to build. Part of me thinks a dreadnought is a good all around instrument, one for an absolute beginner, and one for an advanced beginner who can strum fairly well. The other part of me would like to make two 000's with the body shape of the one I built earlier this year, but with a 14 fret neck and solid peg head. I would have to make some changes to the plans to accommodate the different bridge location, but it shouldn't difficult. I have some head scratching to do still. Anyways, I should start seeing the friendly UPS driver late this week with 4 different orders.

First up, I inspected the bridge blank and noticed it had a fairly good sized crack that started at one end and went in about 1 1/2" into the grain. The pencil mark is where the end of the split was. Fortunately there was plenty of wood to work with even after I cut this end off.

I made a slight change in my bridge shape. I left the upper half the same, but changed the lower half so it has two curves that meet at a point. This makes the bridge look a little less 'chunky' and gives it a bit of a more modern look.

I ran the blank through my thickness sander to get a flat side. I learned on the last one it is important to mark which side is flat, and which side gets the shaping!

I clamp the blank on the top half and run it through the router to get half of it shaped. Then I move the blank to the lower section of the jig and route that part. If everything is lined up correctly, I get a blank with the correct shape that I want.

I layed out a line that was just a touch higher than I wanted the thickness of the two 'wings' and marked where the angled cuts will go. I then marked a rough shape of the curve and took it to my sanding drum on my drill press. I sanded to those lines to get a rough top shape.

Then I used a flat file to get it to within a few thousandths of the final thickness. This leaves enough wood to sand out the file marks.

Then I used a file to put a 45 degree bevel on the tail end point. I was careful to get the center 'seam' to line up with the lower point as well as to keep it straight.

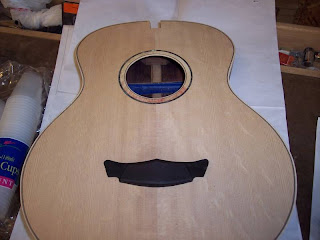
I couldn't help but set it on the body to see how it will look. I have two options with this bridge style. I can put it this way......


No comments:
Post a Comment