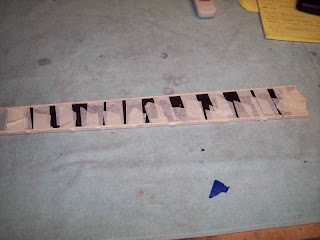
Today I removed all the tape and inspected my work. The bindings looked pretty nice and my miters were pretty nice. It is hard to cut a good miter on a curved piece of wood! I sanded the binding flush with the top and back of the fingerboard and then checked the fingerboard to see how level it was. It had a fairly good sized hump in the center which tapered down to the ends. I took some time with a level with sand paper on the edge try and get it level. It is pretty good now and is ready for frets. I am still on the fence on if I will install the frets before gluing the fingerboard to the neck, or wait until after the neck is on the guitar so I can get it perfectly leveled out before fretting. I like that idea because I can keep from removing much fret material during the setup, but I am a bit nervous about tapping frets in on a finished guitar. I am kicking both thoughts back and forth.
I drilled out the neck block for the bolts and truss rod access and temporarily bolted the neck to the guitar to check the angle. The fit is okay but it needs a lot of work. The neck is dead on from left to right, but it is angled down so the straight edge is only about 1/4" above the top at the bridge location. It will need some adjustment, but it won't be too bad.
This morning I was looking out my front window and there at the corner of my barn were two nice looking whitetail bucks with their antlers still in velvet. They hung around the barn for a little bit before walking into the woods across the road. What a site to see first thing in the morning!

Here are the two visitors to my barn this morning. If you click the picture you will get a better view. One is a 6 point and one is an 8 point buck.

Here is the heel point. I need to cut the heel down to allow for the heel piece thickness. I have curly maple for it, but I am strongly thinking that I will go with box elder to match the pointed piece just below it. I think it will look pretty nice. I need to look to see if I have enough of the pink stuff left though.


2 comments:
That's a great looking guitar, David.
That back inlay is a very unique touch and the whole guitar is wonderfully executed, the design nicely balanced throughout. Can't wait to see it with the heelcap!
Thanks Sam. I glued up the heel cap tonight and used the same pink swirly box elder. It should tie the back inlays together and tie the back to the top with the rosette.
It's getting close!
Post a Comment