Google
 

Monday, May 28, 2007

More of the exciting world of finishing....

Okay, blogging about the finishing process is about as exciting as watching paint dry...... literally! Just an update, the guitar currently has 12 coats on it, 4 of sealer and 8 of lacquer. I did a rough 800 grit sanding last night to open the surface and help it to out-gas. I am planning on giving it 4 more coats tomorrow if time permits and that will be all of the coats completed. Then it is on to the ever thrilling process of waiting on the cure for a minimum of 2 weeks. I really want to be patient though and wait at least 3 and possibly 4 weeks this time. I want the finish to be fully cured before I start finish sanding and polishing.

If my plans from the OLF arrive soon, I will get started on the SJ I want to build. The wood has been in my shop for a couple of weeks now so it is acclimated and ready to go. I guess if all else fails, I can get started making the neck blank until the plans arrive. I really would like to get into a routine or system in building. I am planning on taking plenty of notes as well as a time and cost record for this build so I get some kind of idea of what it really takes to build a guitar. I know that I am by no means an expert, but I do feel that I have enough experience now that I can log my time and get a fairly good idea about the amount of time it takes. Material costs are pretty cut and dry so I am primarily interested in my time. I also have been terrible about note taking and that needs to change. I want to keep a detailed log on my builds from now on so I have a record of what works, and what doesn't work. That is the only way I will get better and start to get some predictability in the sound of these instruments.

I spent some time Saturday working on my dreadnought. You might remember that I adjusted the action at the saddle a couple of months ago, and when I was doing this, I noticed a crack in the saddle. Since I didn't have any guitar related work that I could do, I decided to make a new saddle and make a slight action adjustment at the nut as well. I had an unbleached bone saddle blank hanging around in my shop so I made a new saddle, deepened the nut slots a tiny bit and strung it up. I now have a guitar that has a nice low action with no buzzes. More importantly, I was able to spend almost 3 hours learning some beginner chords and had a lot of fun doing it. The lower action made it much easier for me to fret the strings cleanly which was extremely frustrating for me before. I just couldn't figure out how to fret the strings without touching the adjacent strings. I would try and try, get frustrated, and then finally give up. This was the first time that I actually "played" and had fun doing it. For the first time, I am excited to get the guitar out and start practicing. Hopefully I have turned a corner.

On a totally non-guitar related note, Saturday morning I got up, looked out my window, and saw something strange on my barn. My barn being as old as it is, has lots of holes in it that birds like to get into and make nests. I have one corner where two roofs come together that has been a favorite for the birds ever since we moved here. With spring here, the eggs have hatched and the babies are chirping loudly. It gets my attention every time I go to my spray area of my shop as that is the corner where the nest is. Unfortunately, the chirping also got the attention of something else too. During the night, something (I think a raccoon) got up on the roof and started tearing the roofing off to get to the nest. There was a lot of nesting material all over the lower roof, and two shingles were torn up. These shingles are metal, not asphalt so something with some strength and gripping claws had to pull on them. I am happy to say the claws of whatever was up there must have been too short because the babies are still up there safe and sound. I got up there and re-nailed the roofing down and watched to make sure the momma bird would come back. She did and the bird family is happy again..... so am I.


Oh the horror of it all! This is what the baby birds had to endure over night. Fortunately they made it. Those are metal shingles! I just hope the birds don't need some psychological counselling later in life because of this! Who knows, maybe one day I will see these birds crying on Oprah or Dr' Phil's couch about how they were traumatized as children and that is why they made the poor choices they have made later in life! lol


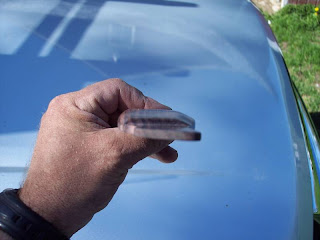
Here is the saddle from my dreadnought. You can see the crack running from the left corner to about 3/4 way to the right. I super glued it and sanded the bottom so the crack was lower down in the bridge. I have since changed it with a new unbleached bone saddle. This is just a good reminder to me why the neck / bridge angle is so important. This was the result of the straight edge being 1/16" over the bridge and an action that was set too high to begin with.


Friday, May 25, 2007

More finishing.....

Not a whole lot of excitement to report. This is the boring part of building, spraying finish, scratch sanding, and waiting. I got 4 coats of lacquer on yesterday, and did a fine sanding today and will spray 4 more coats on it tomorrow. I did have one small issue to deal with. While I was sanding, I noticed that the top had shrunk just at little. The way I noticed this was that the center seam looked much more visible. When I held the guitar into the light so I could get a reflection over the top, I noticed the finish had sunken along a section about 4" long starting at the tail end. The seam was opening up a hair, not enough to break the glue line but enough to see. I decided to mask the section off and force some LMI white glue into the space. The RH in my shop is right around 40% , so the humidity in the shop isn't the problem. I suspect that the problem is that I had filled the body with paper towels and put a piece of cardboard in the sound hole. My theory is that the towels are actually sucking the moisture out of the wood causing it to shrink. The temps have been high, but I don't think they are high enough to cause the wood to shrink. I pulled all the towels out and hung the damp rags inside the body for tonight. Hopefully that will help re-humidify the top and help close that little gap. The one issue I have had since the beginning of this build has been the center seam on the top. The seam is very visible from the tail to about 1/2 way to the sound hole. It looks like the wood got dirty somehow in that seam but I don't know how that could have happened. I was extremely careful when I joined them to make sure that no dust got on the wood while gluing. Oh well, I guess I will call that character!

I was hoping to start building my side bending form and side molds this weekend for my next build, a small jumbo, but my plans still have not arrived from OLF. I am a bit disappointed that I ordered the plans 3 weeks ago now and they still aren't here. First the plans were backordered, then it looks like the first set was lost in the mail. They re-mailed a new set on Tues. but they haven't shown up yet. Maybe they will be in Saturdays mail. If not, the mail doesn't come until next Tuesday. Don't get me wrong, the guys at run the boards, and ship the plans have been very friendly and helpful, but that still doesn't help me when I had planned to make these molds over the 3 day holiday weekend. Oh well, I suppose they will get here some day, and like my Sunday school teachers always told me, patience is a virtue!

With summer rolling in, the temps in my shop have been getting up to the point of very uncomfortable. Yesterday when I was spraying, it was 98f degrees in my shop. That is just too hot, and the heat of summer isn't even here yet. Today when I was up in the city, I sprung for a small window AC unit to put in the window directly in front of my work table. It isn't a huge unit, but it is big enough to blow cool air over me when I am working and that will make things a lot nicer when the heat of summer kicks in. My shop you might remember is a second floor space of a 100+ year old non-insulated barn. I insulated my shop when I built it, but the rest is not so it gets sweltering hot up there. Over the last few years there have been several days where it is over 120 f degrees up there, and that is just crazy to work in. If you have ever tried to go into your attic during the dog days of summer, you know what I am talking about. There are times that I can feel a 30 degree difference from the first floor to the second floor. It feels like I am walking into a furnace when I climb the stairs. I am hoping that I can get the temps down a bit this summer so I can work up there during the heat of the summer.

One day when I hit the lottery, I will be able to build a new fully insulated, heated, air conditioned and humidity controlled shop building. Until then......

Wednesday, May 23, 2007

Finishing

The finishing has officially begun. I had some time today to work on the guitar, so I got the spray booth all cleaned out, the flood lights up, the exhaust fan fired up and the high tech guitar mounting device (sawhorse) all set up. I gave the parts one final inspection, mounted them to the sawhorse and wiped them down with naphtha to make sure no skin oils were on the wood. I was able to get three wet coats, and one wash coat of sealer on the guitar. I like how the sealer makes the wood really come alive, especially the bloodwood. It is really amazing how the finish makes the grain come out, and the colors become much more vibrant. I think I am really going to like how this is going to look!

Tomorrow I will give it a light scratch sanding and try and get 4 coats of lacquer on it. I would go with more sealer coats, but I ran out and I don't want to wait several days for Stewmac to ship it to me.


A few pictures after the first coats of sealer. Note, the white color in the bottoms of the ramps is just the white dust created by spraying this finish. Every time I put another coat on, I have to wipe the top surfaces with naphtha to get rid of this dust.


The back and side. Notice how the bloodwood really stands out now. I am really happy about that because I was thinking that the red was going to be too dark with the EIR. I wanted it to stand out and it looks like it is doing that. I also like how the black strip next to it is kind of disappearing into the dark EIR too!


The side and top. Again, the bloodwood really shows up now.


The heel cap and heel. With all the neck pictures, you will see that my pore filling didn't go as well as I had hoped. I think I am done with the Colortone pore filler. It is just too difficult to completely get all the pores filled with it. I am going to try something different for the next one. I want to see if Target has a better pore filler that is goes with the rest of their finishing system.


Here you can see a couple of small runs in the finish, right under the peg head where it cuts into the neck. No big deal, I will shave them with a razor before the next coats. In this picture, you can see the real color of the neck. Although the staining started out as a disaster, I have to say I am quite pleased with the outcome. The color with dark pores gives it a nice old time look. The main shaft of the neck is also a bit lighter than the heel and peg head which gives it a 'used' look.


Just a couple of bragging pictures. After all the bridge work, I was able to get my bridge to weigh the exact same amount as the pre-made one. I am really happy about that, even though it was because of a bit of luck!


The proof of the weight.


Tuesday, May 22, 2007

All ready for finish......

I spent some time in the shop after work today getting everything ready for finish. First, I realized that I hadn't cut the nut slot in the peg head to the correct size of the nut, so I clamped up some blocks and cut it with my razor saw. I cleaned the slot with a chisel and file until the nut blank fit snugly in the slot. I cut the bottom of the nut to a 15 degree angle to match the angle of the peg head. Once that was done, I needed to get the bridge location figured out. After a lot of measuring, and re-measuring I got the location marked. I found that it is pretty difficult to measure for squareness on a bridge that has no straight edges. I finally figured a way to do it, but I was scratching my head for a few minutes of how I could do this other than eyeballing it.

I am very happy to say that the neck center line is perfect with the center line of the soundboard and body. This is the first guitar that I have built that this ended up being perfectly lined up. My Dreadnought was very close, but the straight edge ended up about 1/16" off of center at the bottom of the guitar. It was close, but not perfect. The OM, well because of the mistake of the soundboard not being centered on the guitar body when I glued it up, I had to make some adjustments to the neck to get everything to look right. Needless to say, the center line of the neck is not center but about 3/16" off center at the bottom. As a side note to this, when I first set the neck up, it was perfectly center on the body, but not the soundboard of course. I ended up having to tweak it a bit to get the strings centered over the sound hole so this neck set was 'purposefully' off center. This OOO was perfect, and I mean perfect. The straight edge lines up exactly with the center line of the soundboard, and the center of the end wedge. And as a added bonus, the straight edge just skims the top of the bridge at its correct location. I guess all that measuring I did when I made the neck block and heel paid off. Now I hope it stays that way after finish!

Anyways, once I got the bridge located, I made a cutout of masking tape to mask off the bridge location for finishing. I thoroughly sanded and checked everything just to make sure there are no scratches, and then masked the neck tenon, fingerboard, and nut slot. I also attached the wood handles to the two parts, vacuumed, blew with compressed air, and wiped everything with naphtha. Tomorrow, they will get their first layers of sealer. I am excited that I have made it to this point. There really is something different having built a guitar from scratch. Don't get me wrong, kits were fun and a lot of hard work, but this is different. I feel like this is MY creation, not Stewmac's or LMI's and my co-creation. I just hope it sounds good! If the ring and sustain I am getting from tapping the top is any indicatior, I think this guitar is going to sound fantastic.

Well, being the person with the will power of a wet noodle, I scoped the OLF swap meet this morning before work, and had to buy two sets of curly redwood tops. One is a parlor size, and the other is a OOO or classical size. Both are beautiful, and again the price was great. The swap meet is now over, and my wallet is grateful of that!


This is one of the two redwood tops I bought. Pretty amazing looking curl isn't it.


And the other top. Now I need to get a plan for a parlor sized guitar to use this and the parlor back I bought.


Here is the cutting guide for cutting the nut slot.


This is how I made a mask that fits the bridge shape. I just put the tape on a piece of glass, trace the bridge and cut it a bit smaller than the bridge. The whole piece comes off the glass and sticks to the guitar top.

Sunday, May 20, 2007

I did it!!!!!!!

Well I finally did it. I spent some time making a jig to cut the saddle slot in my bridge. Once I finally did some thinking about what I was trying to accomplish, it really wasn't difficult to come up with a very simple jig, that was quite effective. Instead of trying to explain it, I will just post some pictures so you can see what it is. Once I got the jig made, I drilled out the pin holes with only one small problem. On one of the holes, the drill bit caught and tore out a small piece of wood around the edge of the hole. It isn't too big, and once I do the final tapering of the hole with a countersink, I think just about all of the chip will go away. Just in case though, I hit it with a bit of superglue so if the countersink doesn't completely remove it, the small chip will be filled. I do have a wide angle step bit so I drilled the holes a little bit for a countersink, but I really need the proper bit. I will get one next time I am at the hardware store.

Once that was done, it was time to put the saddle slot jig to the test. I attached everything to my work bench, took a deep breath and cut the slot. It really was a pretty simple task. I used a 3/32" downcut spiral bit and it took 4 passes to get it cut to the final depth. The slot looks great except the bit wobbled a tiny bit at one end so the slot has a rounded end, but it really isn't noticeable unless you really look for it. One thing I didn't expect though was the 3/32" bit makes a slot that is actually a hair wider than 3/32". The saddle blank just drops in the slot with no friction at all, however I have an 1/8" blank that just barely fits. I think I can sand that down a touch and it will fit nicely. That will also give me a little more saddle to work with when compensating for intonation. Yep, that's right. I am going to try and make a compensated saddle on this one too.

I took all the masking tape off the bridge and body, assembled it and took a picture. I am pretty happy with the neck color. It is a fairly red color, but I think it goes with the rest of the guitar. The only thing I wish I had done differently now though is I wish I would have gone with ebony or granadillo for the headplate and bridge. I think that would look better, but it is too late now to change the headplate, and I am not changing the bridge.

Last night after posting, I was hanging around the OLF site, and picked up another back and side set in the swap meet. It is a piece of quilted maple sized for an OM or OOO. It is a spectacular piece of wood, and I got it and the other piece for a very good price, around a 50% discount off of the best prices I could find on the internet. I also have three rosette blanks coming, one Red Myrtle, one Olivewood, and one Box Elder. All three pieces have some very nice color and figuring so I will have some choices when I start my next build.


Before we get to work, here is something for you all to drool over. This is the Red Myrtle I ordered for a rosette.


Next, a piece of Olivewood for a rosette.


Box Alder, again for a rosette.


The quilted maple back and side set. This will sit for a while until my skills improve. I will probably look at it a lot dreaming about what I can do with it.


The striped mahogany back and side set. The only issue with it is that it is a bit small, sized for a parlor sized guitar. But still, it is gorgeous, and the price was right!


Okay, down to work now. Here is the bridge with the layout I want.


This is the jig I made. It is basically two "Picture frames" screwed together at a 3 1/2 degree angle. The bottom frame is sized for the blank, and the upper frame is sized so my router base fits tightly in it, and it's width is sized so sliding the base from end to end makes the slot the exact length of the saddle slot.


Here it is without the dremel. You can see I marked reference points and I also marked around the rectangle of the upper frame so I can easily line it up exactly. I made a shim out of some scrap that cradles the bottom of the blank and it holds the bridge tightly in the jig by friction. It doesn't move at all.


The bridge after the holes have been drilled. If you look, the hole on the left is the one that I had the bit catch and chip the wood.


Here it is after routing. It worked perfectly. Note, I screwed the bridge to my work table, screwed the bottom frame to the table, and screwed the upper frame to the lower frame. Everything was held down tight so nothing had any chance of moving.


Here is the completed bridge. You will notice that I did two different things on this from the martin bridge. First, I curved the pins around the lower radius cut. Second, I went with a slightly greater compensation angle than the martin blank. The bridge shown on the plans show a bigger angle like this, and the Robert O'Brein DVD I have used as a reference also shows him go with a slightly higher angle. He even mentions that the OM plans show the shallower angle, but he likes to go up a bit. I used his measurements, and that translated out to 3.5 degrees.


Here is a poser picture. I taped the bridge to the guitar.


Here you can see the neck color with the body. I like the contrast the red gives. The color is in-between the brown of the EIR and the red of the bloodwood. I think it ties the two colors together.


Here you can see my neck angle is dead on perfect. The straight edge just skims the bridge like it is supposed to do. This was by far the easiest neck angle set that I have had to do. It lined up beautifully the first try. The only adjustments I had to make were getting a nice clean fit.


This is how the pins look in the bridge. They aren't pushed in all the way so some are sitting a little bit crooked. The holes however are in perfect alignment.

Saturday, May 19, 2007

Who would hav thought staining would be so hard......

Well today didn't go exactly as planned. I thought that I would have almost a full day that I could devote to working on the guitar, but things were just working against me. First thing I did was to finish sanding all of the pore filler off of the body and neck. That went fine. I really didn't like the look of the plain Spanish cedar neck with this guitar. It was too light and since I have a 3 piece tail, I didn't like the glue lines that show. My thought was to stain the neck dark to try and match the body. This is where things went south in a hurry. I mixed some stain and tested it on some scrap neck wood until the color matched the EIR back and sides. I proceeded to apply the stain to the neck, and then wipe it off. Yuck! The color didn't look right. It was too dark, and it there were some spots where the filler didn't sand off completely and the stain didn't penetrate. I tried to sand these areas , but that just made things look worse. I finally spent quite a bit of time sanding the stain off as much as I could, and this was quite a chore on the slot head! The neck now was back to close to the original color with dark spots in the pores.

About this time, my cell phone rings and on the other end was one of my customers with an emergency so I had to drop everything and go to work. 3 hours later, I was back home and in the shop. Thinking about it, this was probably a good break because it gave me some time to get away from it, and think about my next plan of attack. I decided that I would try some mahogany red with a bit of brown mixed in the stain to see if I could get a reddish brown look to the neck. Since the pores were dark, almost black, I figured that if I made the neck more red, it would look like it was a planned design color instead of a mistake. It doesn't match the body, but that is okay because as long as the color is significantly different, it will look like it was a purposeful choice. I would rather it look very different that 'almost but not quite the color' . That would look like a mistake to me.

Anyways, once I got a color I liked, I stained the neck again. Once it dried I sanded it down a little and then re-stained. I am pretty happy with the results. I wish the pores weren't so dark, but the color is good and it goes pretty well with the rest of the guitar in my opinion. Hopefully once the finish goes on, it will look good. I was going to try and start finishing tomorrow, but with this setback, I probably won't get started until sometime this week. I forgot that I still need to finish the bridge so I can get it located and masked off before I can finish the body. Tomorrow will be devoted to finishing (or ruining!) the bridge.

I did have a highlight today. Over at the Official Luther's Forum, they are having their spring swap meet. I was able to score a beautiful Honduran mahogany very highly striped back and side set for a very good price.


Here is the neck all masked off ready for stain. Little did I know at this point how things were going to unfold in just a few short minutes!


Here is the finished stain job. Who would have thought that staining a piece of wood would take so much time and effort. You can easily see the darkened pores in the wood. I can't figure out why the stain wouldn't darken the filler that didn't get sanded off the surface, but it would stain the filler in the pores. It doesn't make sense to me.

Friday, May 18, 2007

More sanding and a failed bridge jig.

Not too much new to report. I spent some more time sanding the body and neck, and then put one more coat of filler because there were still a few pores that were being stubborn! I also spent some time trying to lay out my bridge and make a jig for routing the saddle. I didn't have much luck with the jig, and I am not sure if I like my peg layout yet. I want to do a curve with the pegs but I am not sure if I want to follow the curve of the lower section of the bridge, or the curve of the relief I made. I will play around with it a bit before drilling it out. I think I will need at least the two outer holes so I can anchor the bridge down for the saddle cut.

Again, no pictures tonight. Sawdust really isn't all that photogenic!

Wednesday, May 16, 2007

Wild wild wood......

Woo hoo! Today the FedEx guy showed up really early this morning, before I got out to work, with a present for me. It was a nice heavy box from LMI containing my next build. Of course, I couldn't wait to open it and check out the Camatillo that I picked. I was not disappointed! This wood is incredible looking, and yes as the website says, it's purple! Okay, not exactly purple, but it definitely has a purple-ish hue to it. The back is more brown than the sides, but they match fairly nicely. The best part for me is that not only does it have a sap wood center, but it also has sap wood on the outer edge, and also on one edge of the side wood. I can't wait to see how this one looks when it is finished. It definitely will be my most wild looking guitar to date. I got a highly figured bear claw top which compared to the back and side set, looks downright plain. Everything is in rough form so this will be a scratch build. I am planning on building a small-jumbo. Hopefully my plans will arrive shortly (they were back ordered from OLF) so I can make the bender mold, and the side molds. I also ordered a bending blanket from Minco that hopefully will show up in the next couple of weeks. They were also back ordered but they said it should ship to me before the end of the month. I figured that for the almost $80 savings I got by ordering it direct, it is worth waiting for it.

I did the final sanding on the OOO body and neck, and then did some pore filling. I got the body filled, sanded, and a second filler layer on and dried. I also got the first filler application on the neck. I am waiting for them to dry overnight before I sand it down. One disturbing thing I noticed is that there were several spots where the LMI glue got on the rosewood, and I sanded/washed it off but it still shows up when the filler goes on it. After the first application, I sanded the areas thoroughly to get the glue all out, and then wetted it with naphtha. It looked clean but as soon as the filler goes on, the glue stains show up again. I am not sure what to do about it. I will sand them again so hopefully they will go away. I sure hope they don't show up when the finish goes on. That would be a major problem. I mentioned this before, but although the LMI glue works well, holds tight and seems to be very hard, it also is a real bear to get off of wood with pores in it. It sure would be nice if they could make the glue without the white coloring in it. I have had a lot of trouble with this particular glue actually drying clear. If it is thick it dries clear, but if it is thin it stays white. I am debating on going back to titebond for gluing the body and bindings, and using the LMI glue for braces, neck, neck set, and the bridge. I have also toyed with the idea of trying my hand at hot hide glue.


Here is the new back and side set. It is camatillo rosewood. Really some wild looking stuff isn't it! Looking at the sides, it would be kind of cool if I could get the sap wood to line up with the upper and lower bouts, and have the dark wood in the waist. Oh, and this wood in dry, no wetting to show the grain. It really pops a lot more when it is wet.


Here is the wood for the next build, a small jumbo.


There is the top. Bearclaw sitka spruce. It doesn't look quite a figured as my OM top was, but it still has some nice figuring to it. One thing I messed up on this order was that I forgot to have LMI thickness sand the top. I guess my RO sander is going to get a workout on this one!


Here is the OOO after the second application of pore filler. The wood really looks nice when it is wet with the filler. It kind of gives me a sneak preview of what the finished guitar will look like.


The neck after the first application of pore filler. I think I am going to stain this neck to try and match the dark rosewood color. The main reason is that I don't like seeing the glue lines for the heel blocks. The glueup was very tight, but the lines are still visible. That is another issue I have with the LMI glue it is quite visible on glue lines. I have a very visible center line on the light colored Adirondack top that I am not very happy with. Unfortunately, there isn't anything I can do about it.

Tuesday, May 15, 2007

A bit more sanding and some pore filling.....

Tonight after work, but before the spring chorus concerts my daughters were in, I spent a little time doing the final sanding of the body, and started some pore filling. This guitar is a little different than the others I have built because of a couple things. First, the Adirondack spruce top is really soft. It doesn't take bench rash very well so I had a lot of fine sanding to do to get rid of any dings and dents I had in it. Even when I thought I was done, I would take it out into the sunlight, mark the flaws I could see, and go back to sanding. I finally got it done, and ready for pore filling. The other thing different is the wood binding has some small pores in it, and the Koa rosette has big pores that needed filling. My other builds had pre-made rosettes, perflings, and bindings with no pores so I didn't need to deal with this. So, I masked off around the binding and rosette and covered them with clear pore filler using a small paint brush. I tried to smooth it out a little bit with a rubber spreader but with the masking tape , smoothing wasn't very successful. I decided to just let it dry and I will sand it flat tomorrow. The filler sands easily so it shouldn't be a problem. Once that is done, I will mask the whole top and fill the back, sides, and neck. If things go well and I have enough time, I will try and start finishing it this weekend.


Here it is masked off and with pore filler on the edge and rosette. Hopefully it will sand off easily enough so I don't mess up the soundboard. I guess I will find out tomorrow!

Sunday, May 13, 2007

Lots and lots of sanding.....

Despite the beautiful weekend weather, and all the outside work that needs done, I spent some time in the shop last night and this afternoon getting the guitar ready for pore filling. I spent a lot of time sanding, wetting with naphtha, re-sanding, rinse.... repeat. One thing I noticed is that my shop got a bit dry again, right around 35% RH and the body has flattened out a bit. It still has a radius on both the top and back but not the 25' and 15' radius's that I built it with. I also noticed that the center joint of the back opened up a little bit in a couple of spots so I masked it off and forced some LMI white glue into the seam to re-glue it. Other than that, everything is going well with the final sanding. I have a couple of small dings in the top I need to deal with. I tried wetting them and heating the spots with a heat gun but it didn't lift the dings all the way up. I have some repair filler that I used on my Dreadnought for this purpose and I will use it again on this to fix these two spots. Neither will be visible once it is finished.

One thing I have noticed is that since all the sanding, the top really has a fantastic tap tone to it. I have no idea what note it is, but it has a nice clear sound when tapped, and it 'rings' for a very long time after the tap. It holds a tone significantly longer than the OM did when I was tapping it. I had this sustain when I braced it, but it kind of went away after gluing it to the body. Now that I have been sanding and thinning the top, it keeps getting better and better. I am very excited to hear the sound of the finished guitar. If this tap sound is any indication of the final sound, I believe this is going to be an amazing sounding guitar.

Now I am kicking myself that I didn't take good notes of the exact dimensions and weight of the bracing, or the weight of the top. Oh well, I do have pictures, and I know what the measurements were of the blanks before shaping.

Sorry, no pictures today. I guess I could have taken pictures of all the sanding dust but that really would have been boring to look at!

Thursday, May 10, 2007

Slothead decision made....

After a lot of thinking today, I decided that I wanted to square off the bottom of the slot ramps. I used a straight edge to extend the edge lines down, then used my razor saw to cut the edged of the ramp. After that, I cut the ramps with a 1/2" chisel. I have to say, I am much happier with how it looks. I just wasn't too happy with the round ramps. These look like they fit the design better. After that, I did a lot of sanding to clean the slots up, and sanded the body. I still have a lot of sanding to do, but I think I might have it ready for pore filling this weekend. Oh, I also spend a few minutes filling the gap on the top where the binding and perfling strip didn't get pulled tight at the waist. I used superglue and ebony dust to fill the gap.


Here is a side by side comparison of the ramps. I guess by this time, the decision is pretty much made!


I cut the edged of the ramps at and angle using my razor saw.


The two ramps cut but no sanding has been done yet. The shiny glob on the right slot is a bit of CA. While running my chisel up the slot, I slipped and shaved the edge of the slot a bit.


Here is the peg head after some sanding. I still have a bit more work to do on it, but it is getting close to being done. I have to say, these slot heads are a lot more work than solid peg heads!


Wednesday, May 9, 2007

Fretting about superglue and ramps.......

Sorry my postings have been a bit sparse lately. Work has been very busy, and the weather has been so beautiful that I have been having a tough time staying inside to work on the guitar. Tonight, after dinner I decided I have been neglecting my duties long enough so I went up to the shop and spent a couple of hours working on the neck. I first decided to get the rest of the frets put in. After hammering them in, I noticed a few of the frets that I had already installed were popping up a little on the ends. After trying to hammer them back down, I decided that they weren't in there secure enough for my comfort level so I hit them all with thin CA to set them. After that, I spent the next hour cleaning the glue off of the fingerboard! There must be a better way to do this than just wicking it along the edge of the frets. It ended up getting on the wood between every fret so I had a lot of sanding and cleaning with acetone to get it all off.

After that, I filed the ramps at the bottoms of the slots, and then did some sanding on the peg head. I am not sure if I am happy with the ramps or not. My plan was to have round ramps on the front, like normal, but keep the back half of the slots square so when you look at the back of the peg head, the slots look squared off. I did that, but I am not sure if I like it or not. I am debating on two options. First, round off the rest of the slot and be done with it. The second is a bit more ambitious, and different. I am thinking about actually squaring up the ramps so they are rectangular shaped instead of round. In my mind, I think that it would be pretty cool looking but I am a little afraid to do it because once I commit to doing it, there is no turning back. I will think about it some more before I make my final decision.

Oh, and I got that magic e-mail tonight from Fed-Ex telling me I have a package on it's way to my house from LMI. Woo hoo! I can hardly wait!


For those wondering how I hammer the last frets in, this is how I support the fingerboard extension. I have a hole drilled in the edge of my table that the truss rod fits in.


Push the truss rod in and like magic, the extension has support and the neck is held in place.


Here is the peg head with the ramps cut. Also, I slid in the tuners to get a feel for how the finished head will look. The whole thing is wiped with naphtha.

Sunday, May 6, 2007

Too much sunshine, too little building....

Not much happened this weekend in the shop. The weather has been absolutely fantastic, and it is hard to be cooped up inside when there is bright sunshine, warm temp's, and plenty of yard work that needs done! I did spend a little time making some fine adjustments to the bridge but that was all the time I could force myself to spend inside. One thing I did get done though was to get the parts ordered for my next build, as small jumbo. I picked a bearclaw top (gotta love that bearclaw look!) and camatillo rosewood for the back and sides. This will also be a scratch build with the only servicing being done for me is thickness sanding. Maybe by the end of this summer I will get a thickness sander so I can do that myself too. I ordered some plans from the OLF site for this build. Hopefully I will get some time this week in the shop so I can get the OOO in the finishing room. I would like to get things timed out like I did the last time, so I can start building the next one while the last one is in the curing stages.

So, here I am again with that excited feeling, anxious to get that box of wood in my hands so I can make some more sawdust, and hopefully a bit of noise that sounds like a fine guitar!

Friday, May 4, 2007

A little more bridge work.....

Tonight after work, I spent just a little bit of time working on the bridge. I decided I wanted a double layer effect on the bridge so I flattened the two wings out and beveled the trailing edge, and rounded the leading edge. This kind of gave the pin and saddle section a curved shape. Then I sanded and polished it with my micromesh pads. I am really happy with it. Now I have to drill the pin holes and route out the saddle slot. I have the tuners, a 3/32" downcut bit, and some lacquer on order from Stewmac so until that shows up, I won't be doing the saddle slot. I have my LMI order all ready to go, I just need to make the order which will probably happen this weekend. I measured several thicknesses against a martin style bridge so this bridge has the same critical dimensions. Also, this bridge only weighs 2 grams more than the martin bridge, and that is before drilling out the peg holes and routing the saddle slot. I am sure once that is done, this bridge will be equal to or slightly lighter than the premade one I have.


Just a few pictures of the finished bridge.


Note the rounded front and tapered rear edges.


The actual profile is pretty similar to the Martin bridge.


Here you can see how the rear taper makes the top look curved. I really like the look.


Thursday, May 3, 2007

Bridge.....

The first thing I needed to do when I got in my shop was to get the fingerboard edge markers drilled and installed. I am using 3/32" (2.5mm) abalone dots for this, so instead of drilling holes without really worrying about depth like normal, I had to drill these like I did the fingerboard top. Other than the depth of the holes though, the installation is essentially the same as using rod stock. First I marked the holes, drilled them, and installed the dots. Really it wasn't much of a big deal. I like the look of the abalone dots instead of black or white dots. I have a lot left over so I am thinking I will use them on the next build.

Once that was done, I decided it was time to tackle making a bridge. You might remember way back when I first ordered the material for this guitar, I mentioned that the only part of the build I was concerned about was making a bridge. So far, my concerns have been un-warranted. First step, make a design. I had some ideas rattling around in my head so it really wasn't too hard to come up with something that looks different than the standard "Martin" bridges. I am not sure if my design is an original design or not, but it doesn't look like bridges you see everyday. I am happy with the design. Once I had the design drawn up, I made a template out of pressed board to use as a router guide for cutting a jig. I made a jig that holds the blank, and uses the edge as a guide for the router bearing to run along while cutting the blank. After the jig was made, I rough cut the blank to shape, clamped it in the jig and cut it to shape using my router. It worked pretty well. I then used my rotary microplane and sanding drums in my drill press to start shaping the arc of the top. That is where I left off. I have the bridge cut to shape and thicknessed to rough shape. I still need to shape the edges, finish sand it, drill peg holes, and route for the saddle. I am going to drill the peg holes in a curve to match the outer edge of the bridge. As far as routing the saddle slot, I have some ideas of how to do it with a jig. With this being the most critical part of the bridge, I hope I get it right without messing up the bridge!


The fingerboard all marked up and ready for edge markers.


As promised in my last post, here is an end shot of the heel so you can see the curved shape.


The edge dots installed. ( the stain on the neck is just some acetone. I got a little CA on it and used acetone to clean it up. It dried shortly after the picture was taken)


Hmmm, doesn't look much like a bridge now does it?


My bridge design. I don't know if it's original or not, but I like it.


The pressboard template .


I screwed the template on a piece of 1/2" plywood and used a flush cutting bearing bit to shape the edge of the plywood.


The same thing being done on the bottom.


The blank clamped in place. Note the center line mark.


Ready for the router.


The top half run through the router.


The blank moved to the bottom half. If you expand the picture, you can see that I marked the top radius using the template so I can get the blank exactly lined up.


Here it is after the router work. Not too bad for my first try!


And here it is after some sanding work. I used the Martin bridge to get the dimensions needed.


The bridges by edge one behind the other.